Puppeteerをtypescriptで使う
前回はseleniumを使ってみたので今回は別のブラウザ操作ライブラリPuppeteerを使ってみます!
Seleniumをtypescriptで使ってみる - buto > /dev/null
Puppeteerインストール
npm install puppeteer
ブラウザ操作コードを書きます!
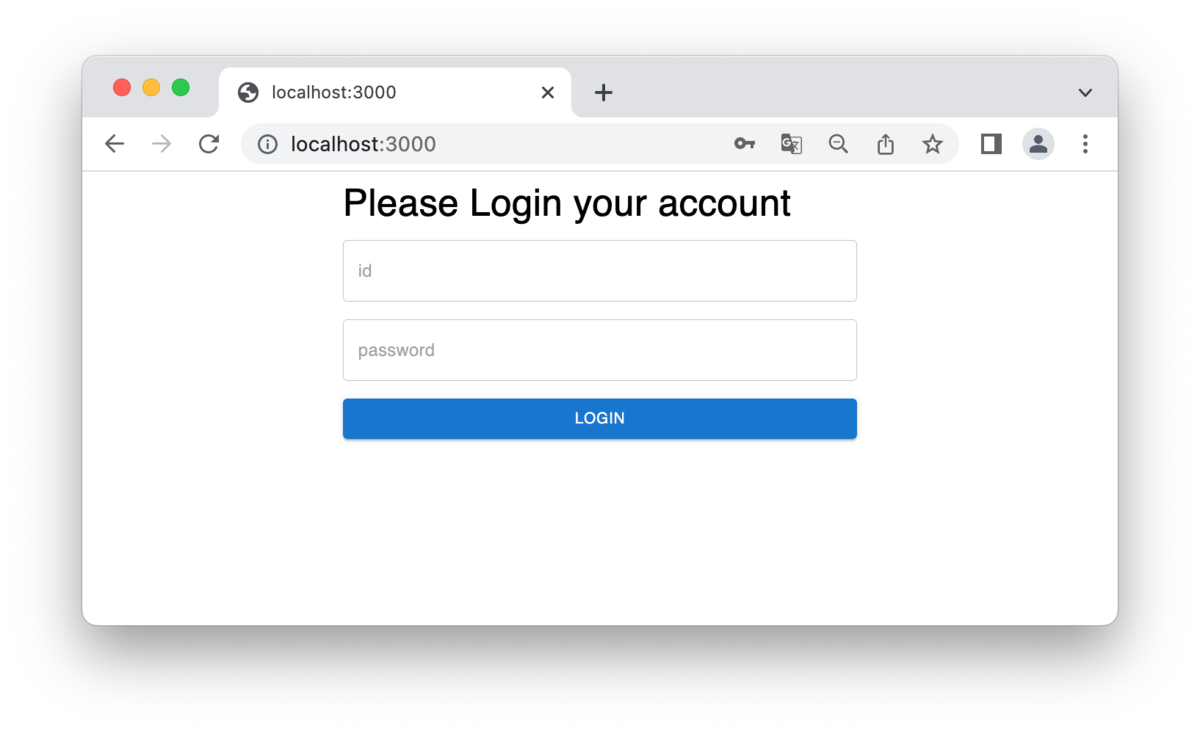
今回もこちらのログイン画面を操作します
puppeteerはchroniumという軽量chromeが一緒にインストールされているので
特に指定しなければchromeが動いてくれます
const puppeteer = require('puppeteer');
const assert = require('assert');

/**
 * ログイン成功
 */
(async () => {
    const browser = await puppeteer.launch({ headless: false });
    const page = await browser.newPage();
    await page.goto('http://localhost:3000');
    // IDパスワードを入力
    const userId = await page.$('#loginId');
    await userId.type('xxxxx');
    const password = await page.$('#password');
    await password.type('xxxxxx');
    // ログイン
    const loginButton = await page.$('#loginButton');
    await loginButton.click();
    await page.waitForTimeout(3000);

    // 支払い一覧ページへ遷移していること
    assert.strictEqual(await page.url(), "http://localhost:3000/payment");
    await browser.close();
})();
seleniumと比較するとコード量が少ないです!
あらかじめ npm run serve で開発サーバにアプリをホスティングしておき
node loginTest.ts で上記テストコードを実行しましょう!
ブルーのchroniumアイコンが起動します

動きはseleniumと同じです